Getting Started
DJUST provides environments on two phases:
Pre-production:
http://{YourCompany}.prep-prod.djust-app.comFor testing purposes, where you can design and integrate your data model: import products and offers, create jobs, test integrations with your existing systems...
Use anonymized data (emails, user names, products...) on this platform. DJUST also recommends requesting a reset of your data after a first phase of testing.
Data integrated in this environment will not be shipped to the production environment.
The testing environment is not as performant as the production one. For optimization purposes, DJUST recommends adding data by batches of 1,000.
Production:
http://{YourCompany}.djust-app.comThe replication and import of your data in the production environment can take from a few days to a few weeks, depending on the size and complexity of the database.
The pre-production environment remains available to continue testing before implementing changes in production.
Conventions in use for this chapter
- Client refers to the customer purchasing DJUST solution.
- Customer refers to the end-customer using the client's front-end to buy products.
Configuring the DJUST platform
Email alerts settings
Email addresses must be created before proceeding the account creation, otherwise you will not be able to receive the email to activate your account. As of now, you need to ask your solution consultant to create those email adresses, but soon you will be able to do it from the DJUST's back-office.
DJUST can be configured to send email alerts.
If using Mirakl, emails are triggered from Mirakl.
The following emails can be sent:
- Account creation validation
- Account creation request
- Quote refusal (supplier)
- First user creation on an account
- Message on order
- User creation on an existing account
- Order validation
- Quote validation
- Quote creation
- Message on quote
- Quote cancellation
- Password reset
- Quote update
- Quote validation (supplier)
- Order acceptance
- Order refusal
- Message on operator's quote
- New order
- Order confirmation
Emails can be customized:
Click Settings → General settings → Email template editor.
The list of templates appears. Click the edit button in the Action column to edit a template.
Select the target language for the email template.
(If in multistore) Select the storeView for the email templates to apply.
Enter a Subject (email's title).
Subjects are optional as each template contains default subjects. Also, variables are not supported.
Fill in Additional recipients (Cc or Bcc) if needed.
Use the right panel to create the email template. Refer to Unlayer's documentation (opens new window) for more information.
Use the Variables section to get the list of variables to help you build the email template.
Other Unlayer resources for templating
Click Save.
Users management
Internal users are operators of the DJUST back-office. Several levels of rights are available:
| Group | Description |
|---|---|
| Operator_Admin | Read, write and delete rights. |
| Operator_User | Read and write rights. |
| Operator_Reader | Read-only rights. |
Use the following procedure to add two users:
- One for the internal DJUST integrator,
- One for the client.
Both must be set as Admins.
Create new users
Click Settings → User management → Manage internal users. The Manage internal users screen appears.
Click + Add User.

Fill in the following information:
- Civility
- First name
- Last name
- Groups
DJUST does not recommend using
adminas First name or Last name.Click Create. The new internal user appears in the Manage internal users screen list.
Log out from the back-office, and follow the Forgot password? procedure to reset the password.
Log back in as the new user.
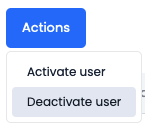
Deactivate the default user
From the Manage internal users screen, select the
operator@djust.iodefault account.
Click Actions and select Deactivate user.
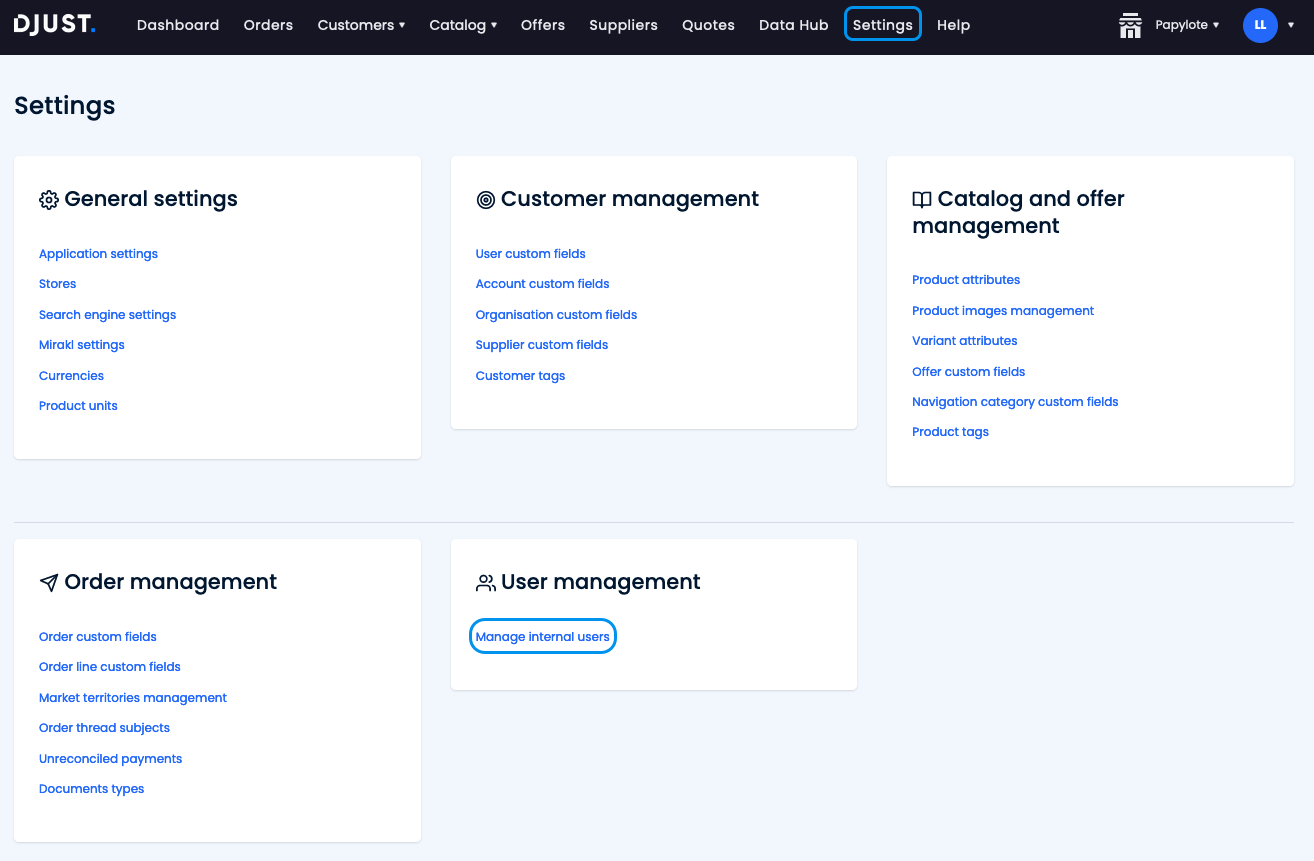
Application settings
Go to Settings → General settings → Application settings to configure your front-end.

The following options are available:
| Field | Description |
|---|---|
| Default locale | Default back-office language set during the DJUST platform creation. Each internal user can switch their own language through their personal settings. |
| Marketplace | Enables the multi-suppliers module. Slide the toggle switch active if selling products from multiple suppliers. Upon activation, automatically deactivates the E-commerce option. |
| E-commerce | Disables the multi-suppliers module. Slide the toggle switch active if selling products from the company or a single supplier. Upon activation, automatically deactivates the Marketplace option. |
| Customer account approval | Enables the manual approval of each customer account. Leave disabled to let customers freely create their account. |
| Round up rule | Rule to round up prices. Recommended if working with taxes. (Lower cent, Upper cent, Nearest cent) |
| Front office url | Endpoint for the front-end, appended with /auth/validation. |
| Specific prices for customers | Enables setting different prices for specific customer groups. |
| Manage order threads | Enables customers to report incidents or add a message to an order. |
| Unpriced offers allowed | Enables setting offers without a price. |
| Asssociation suppliers/customers allowed | Enables the association of customer account(s) to specific supplier(s). |
Click Save to apply the settings.

Language settings
Products, their attributes and variants can be configured in several languages. In DJUST, this parameter is called locales. Each product, attribute or variant is then available in different languages depending on the user's request.
Locales must not be mixed up with the back-office or store(s) language.
Click Settings → General settings → Locales management.
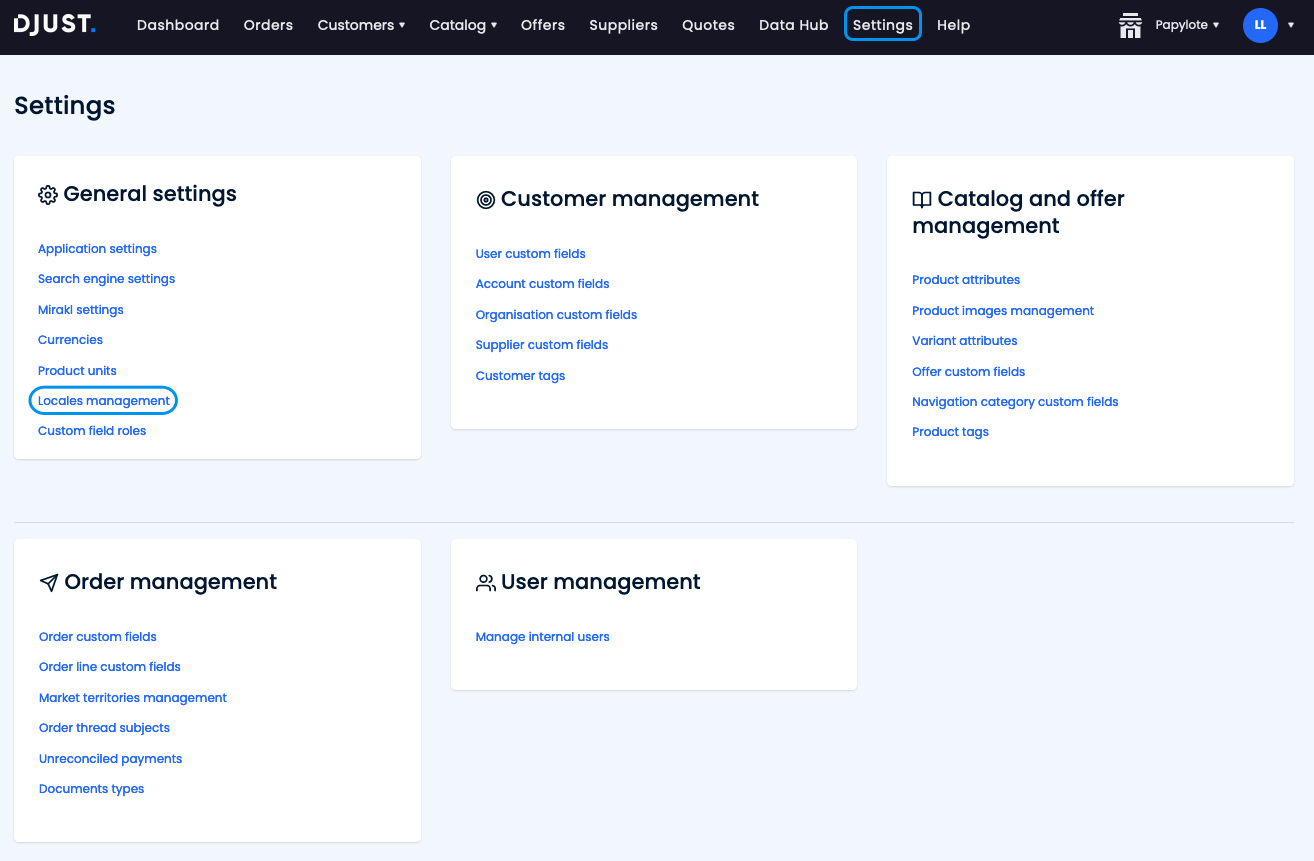
Click + Add locale.
Select the language you want to add.
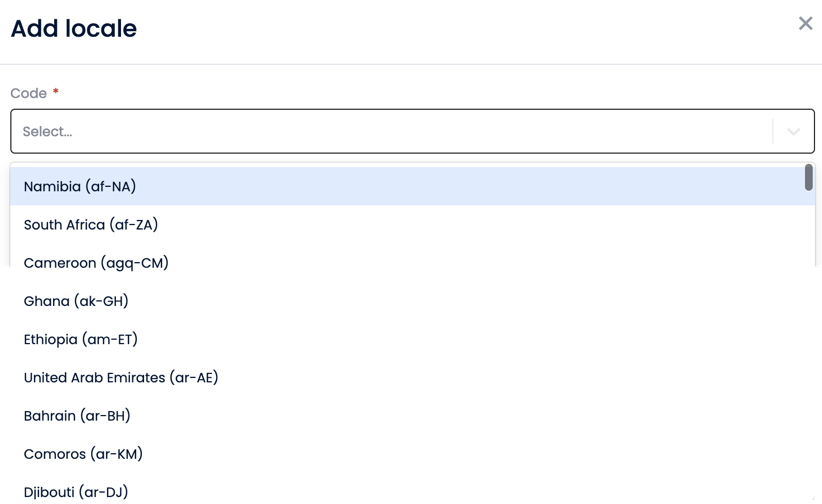
Click Create.
If you have multiple stores, locales are available for all of them. Stores cannot be configured with specific languages.
Adding accounts
Accounts are groups of customer users. Each customer user must be attached to an account.
Click Customers → Accounts. The Customer accounts screen appears.

Click + Create account.

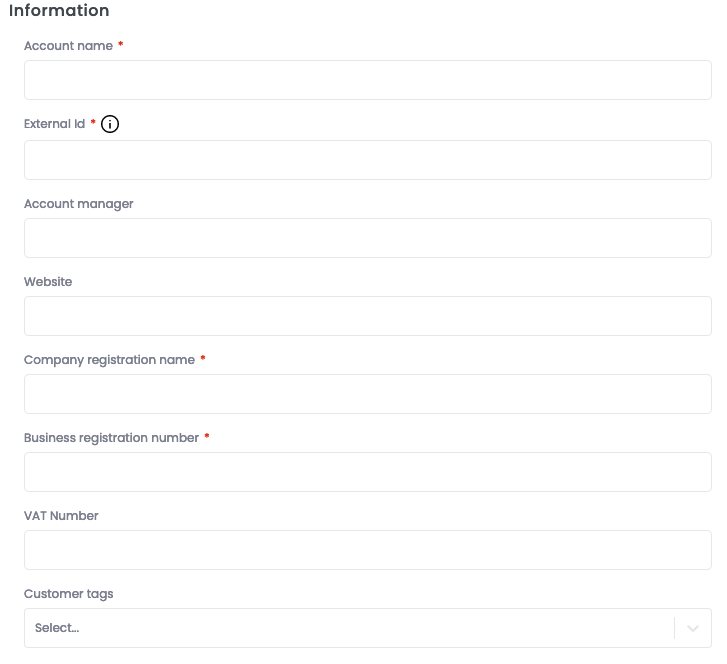
Fill in the Information:
- Account name
- External Id
- Account manager (optional)
- Website (optional)
- Company registration name
- Business registration number
- VAT number (optional)
- Customer tags (optional)
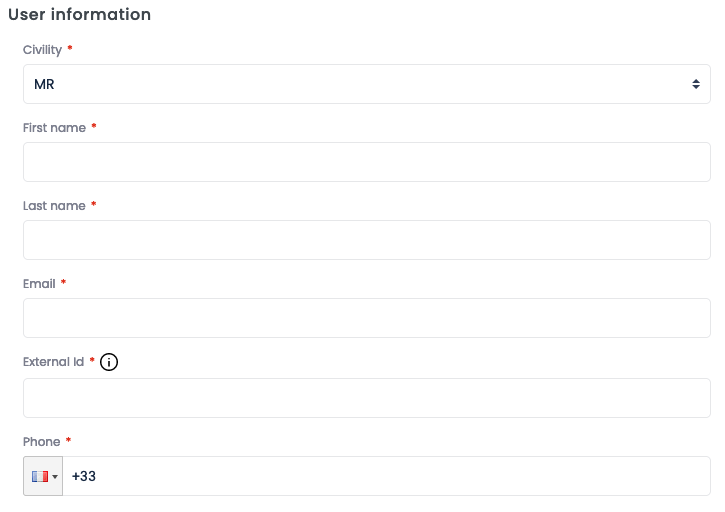
Fill in the User information:
- Civility
- First name
- Last name
- External Id
- Phone
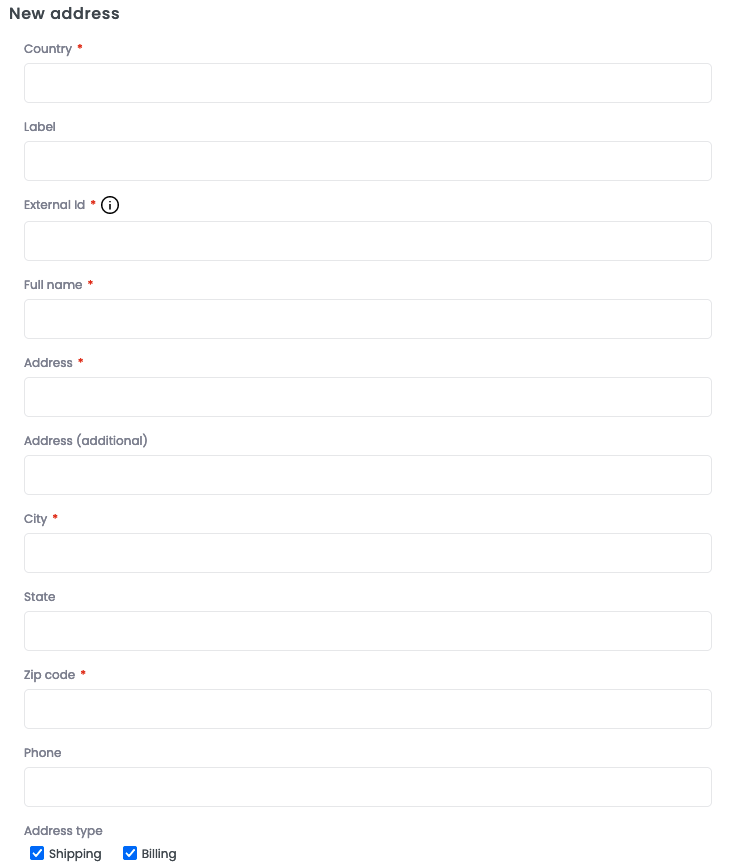
Fill in the New address:
- Country
- Label (optional)
- External Id
- Full name
- Address
- City
- State (optional)
- Zip code
- Phone (optional)
- Select whether the address is used for shipping, billing, or both.
Click Create.

The new account is active by default, but the first user is in the waiting for activation status. An activation email is sent — the user must click Forgot password? on the authentication page, set a new password and log in to be active.
Creating custom fields
Custom fields are fields you can create and add to your back-office depending on your needs.
Supplier custom fields (optional)
This only applies to marketplace platforms (allowing several suppliers or sellers). If you have an e-commerce website for your own products, skip this step and go to the Other custom fields section to create other custom fields.
Ensure that the name of the custom field and the external ID are not the same. This will cause importation issues.
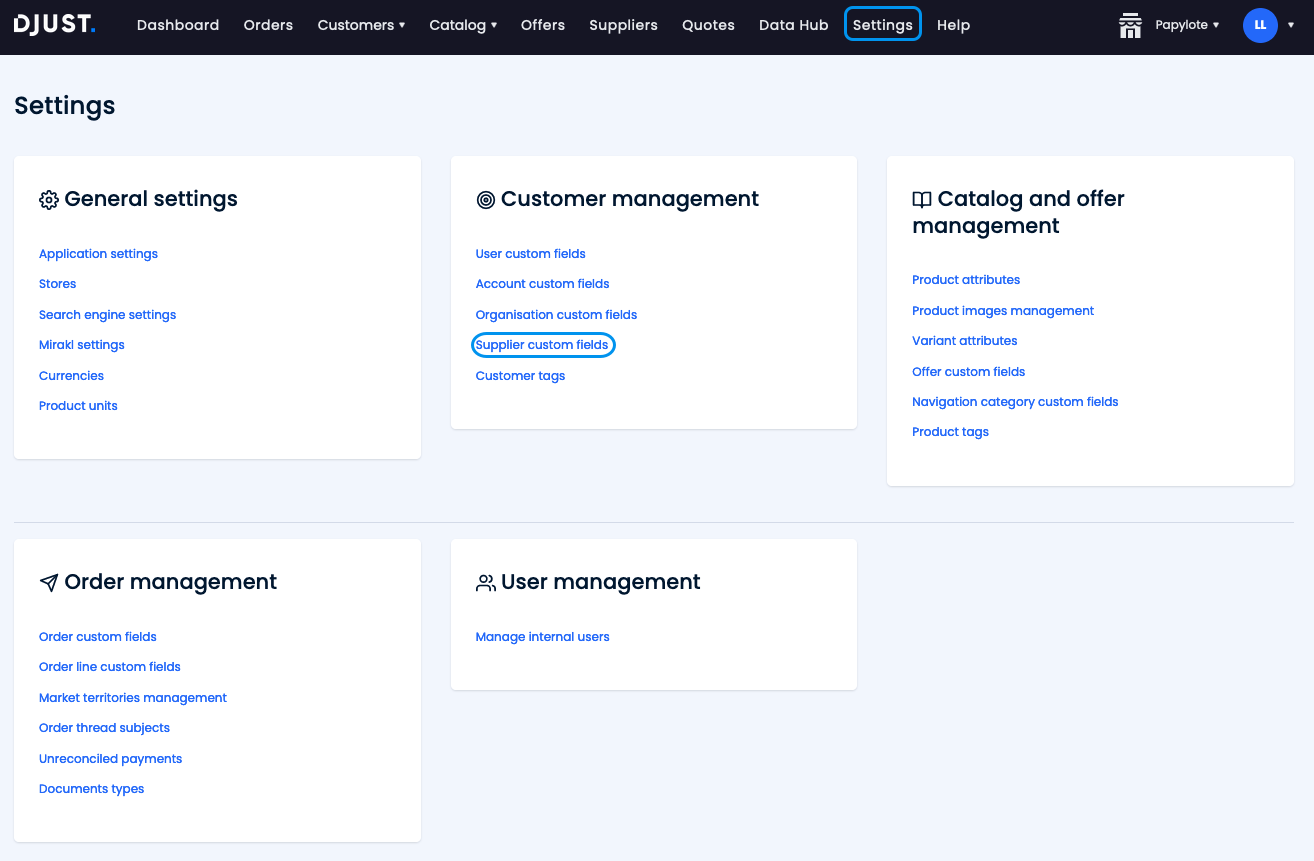
Click Settings → Customer Management → Supplier custom fields.
Click + Add custom field and fill in the form:
- Name your custom field (example: "industry sector").
- Choose a type among the following:
Type Options Long text - Text - Number - Metric Unit: Weight, Volume, Length, Area (Metric/Imperial). Date - List Value: Text, Metric (see above). Multi select: Yes / No. Boolean - Media Type: Document, Image, Video. Max file size (in kB). - Choose an external ID for this field (with no space and no accent).
- Choose whether the custom field is required or optional.
Do not add too many required custom fields as this can prevent you or other operators to add new entities if they have all the required information.
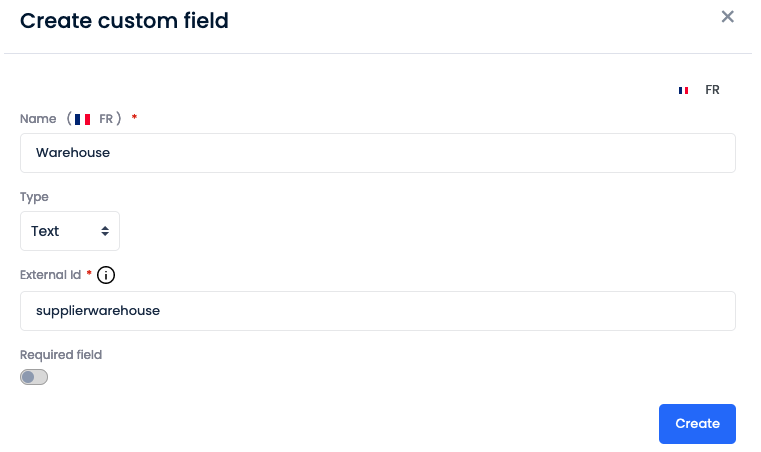
Click Create: the new supplier custom field appears in the list. Its status is set to "active" by default.
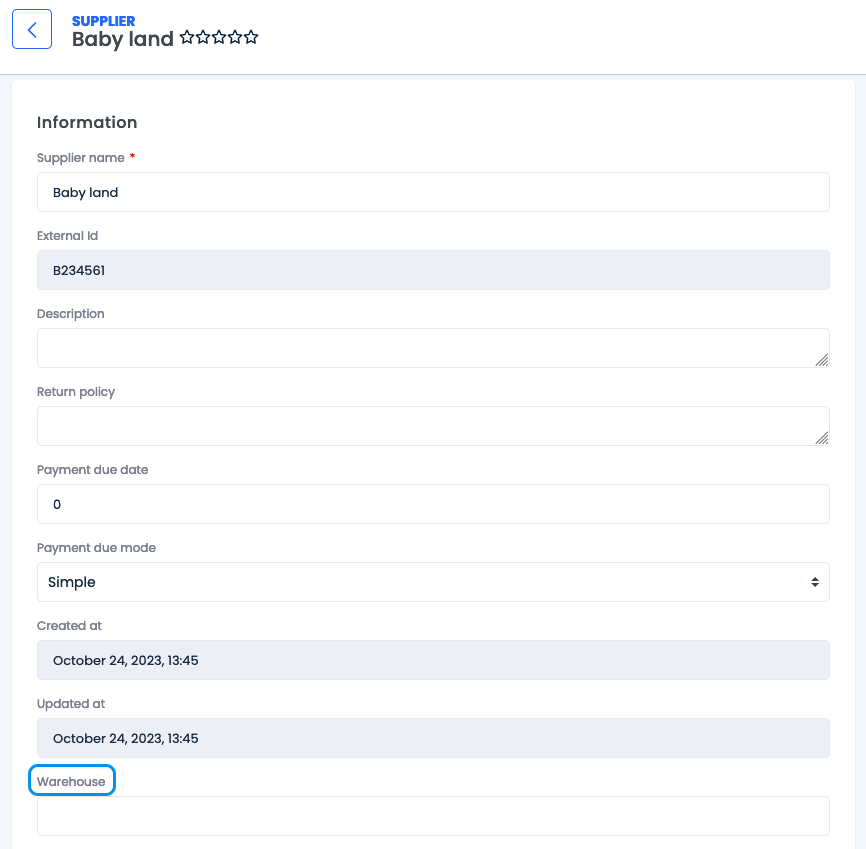
Your new custom field appears right away in the Supplier section if you add a new supplier.
Other custom fields
Custom fields can be applied to other elements in DJUST:
- Navigation categories
- Users
- Accounts
- Organisations
- Offers
- Orders
DJUST recommends creating all the needed custom fields before starting to input any data. If you modify custom fields after importing some data, you will need to re-import the data model first, and then to re-import your data.
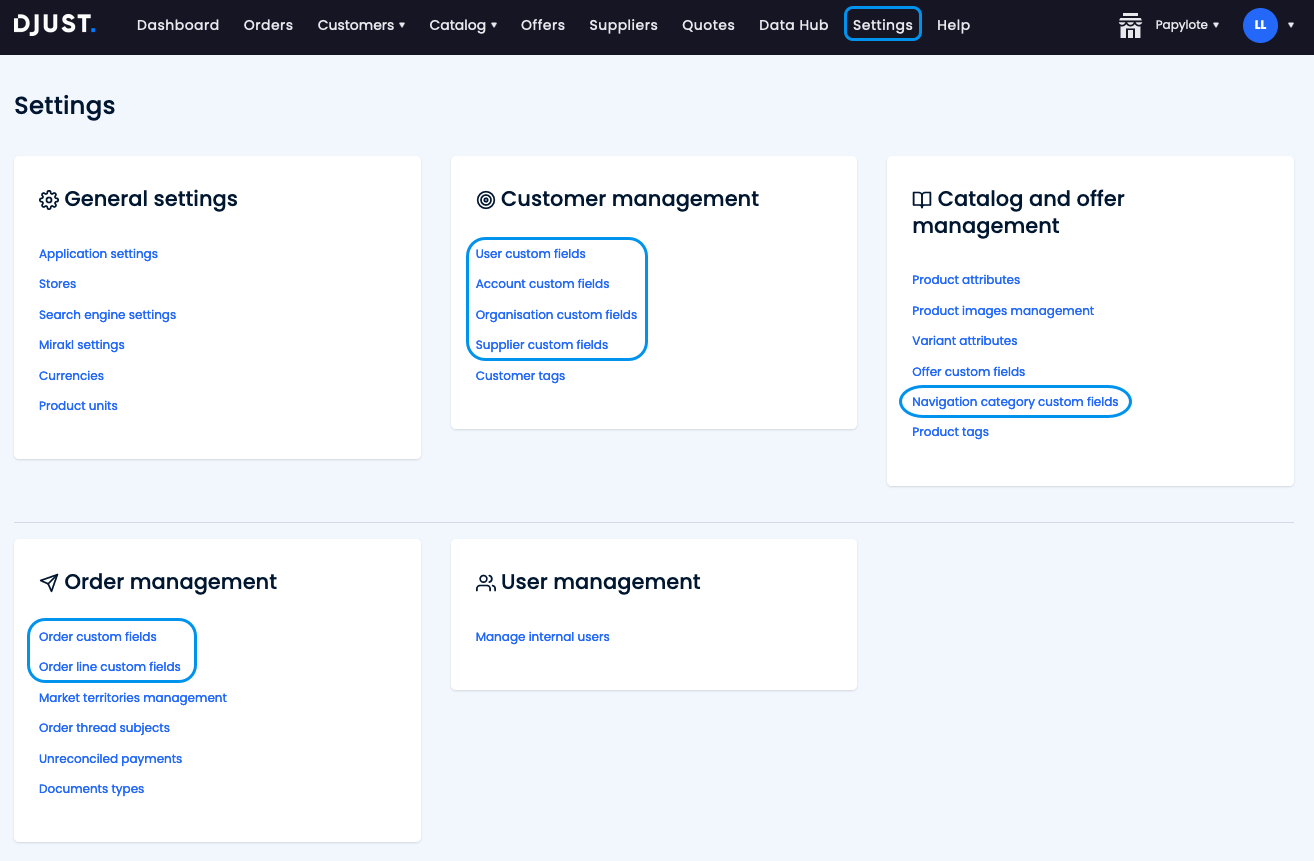
Go to Settings, and choose between:
- Customer Management section for User, account and organization custom fields.
- Catalog and offer management section for Offer custom fields.
- Order Management section for Order and Order line custom fields.
Click Add custom field and fill in the required fields to create the new custom fields.
- Name your custom field.
- Choose a type among the following:
Type Options Long text - Text - Number - Metric Unit: Weight, Volume, Length, Area (Metric/Imperial). Date - List Value: Text, Metric (see above). Multi select: Yes / No. Boolean - Media Type: Document, Image, Video. Max file size (in kB). - Choose an external ID for this field (with no space and no accent).
- Choose whether the custom field is required or optional.
Do not add too many required custom fields as this can prevent you or other operators to add new entities if they have all the required information.
Configuring Mirakl (optional)
Click Settings → Mirakl settings.
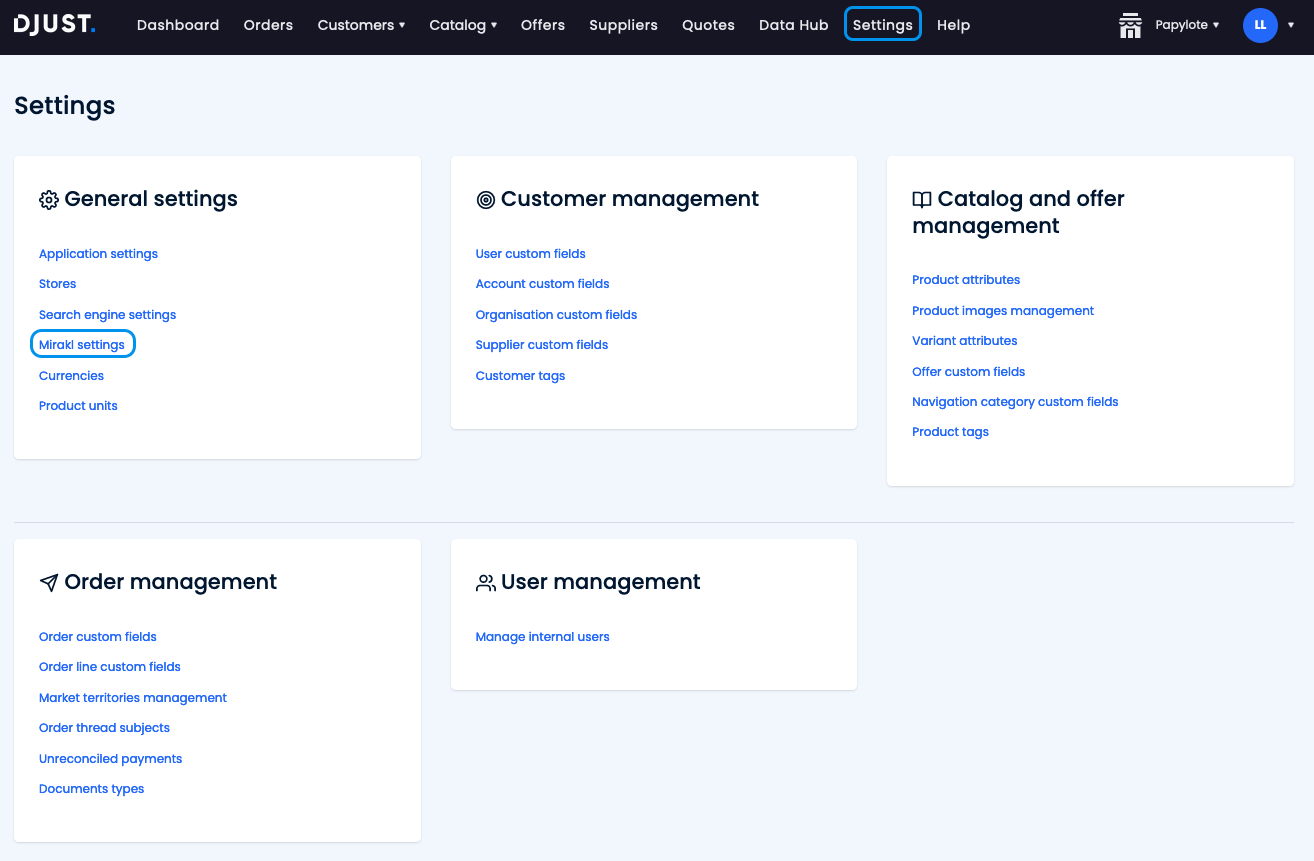
Fill in the following fields.
- API Url:
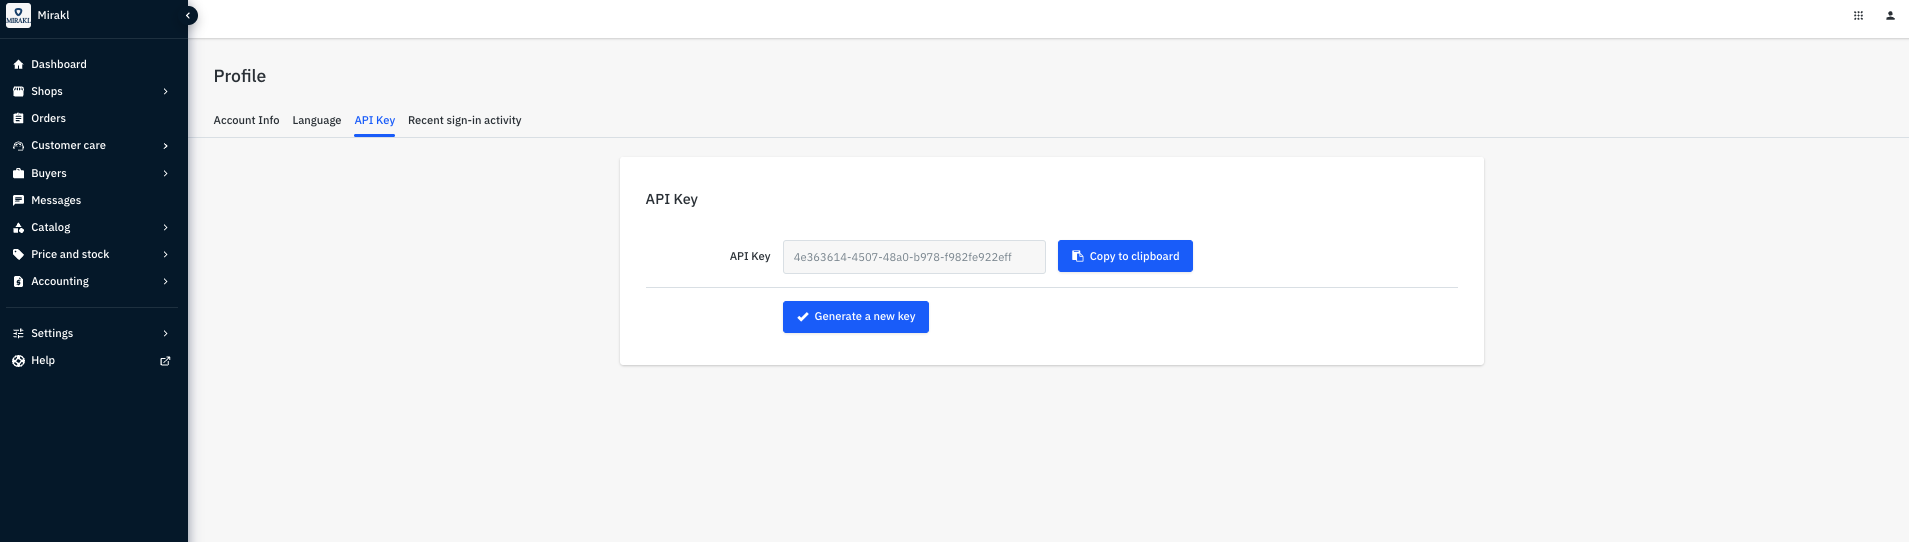
https://djust-dev.mirakl.net/ - Operator API key: can be found in Mirakl's back office under Settings
→ User Preferences → API key. Copy and paste the existing key, or
generate a new one.
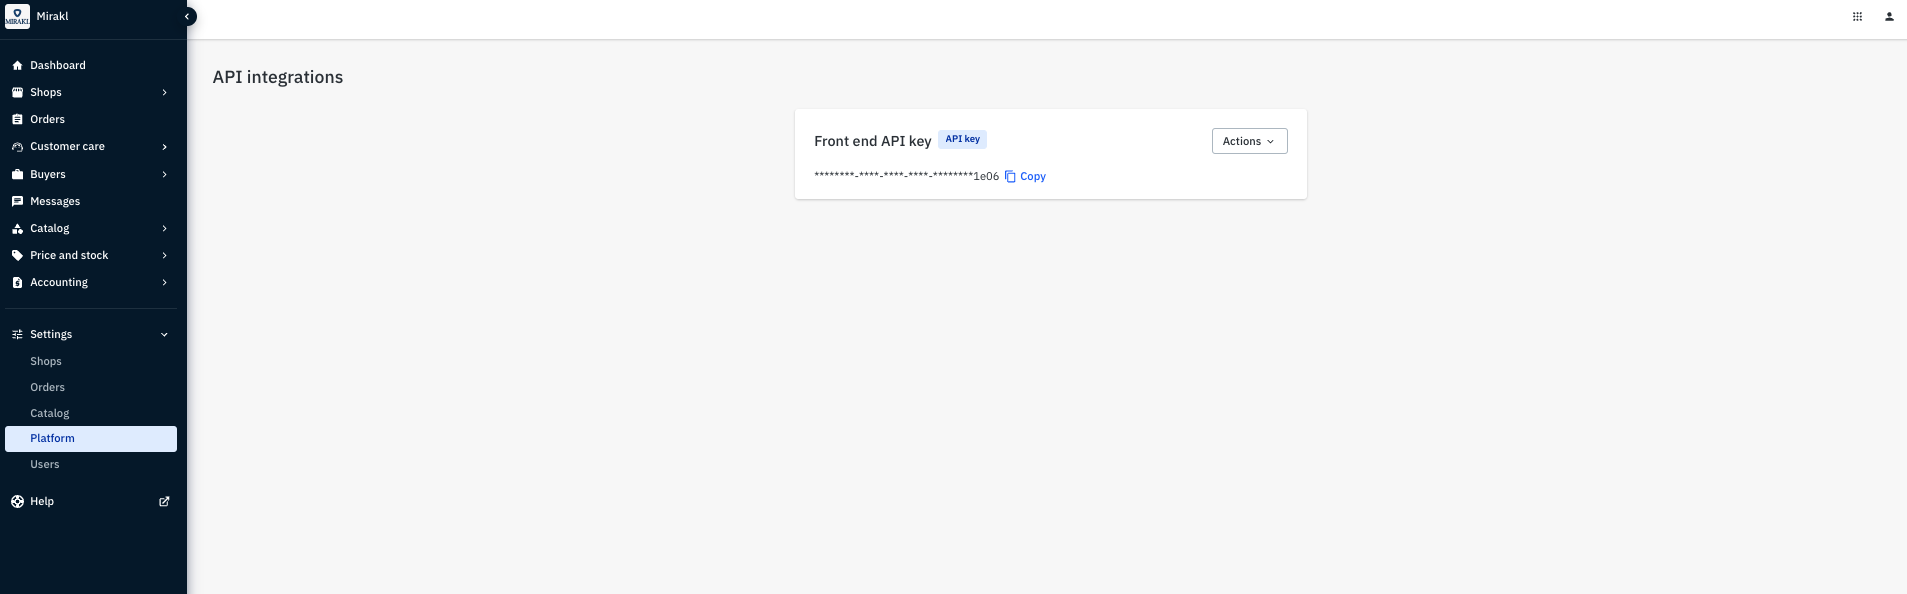
- Front Office API key: can be found in Mirakl's back office under
Settings → Platform → API integrations.
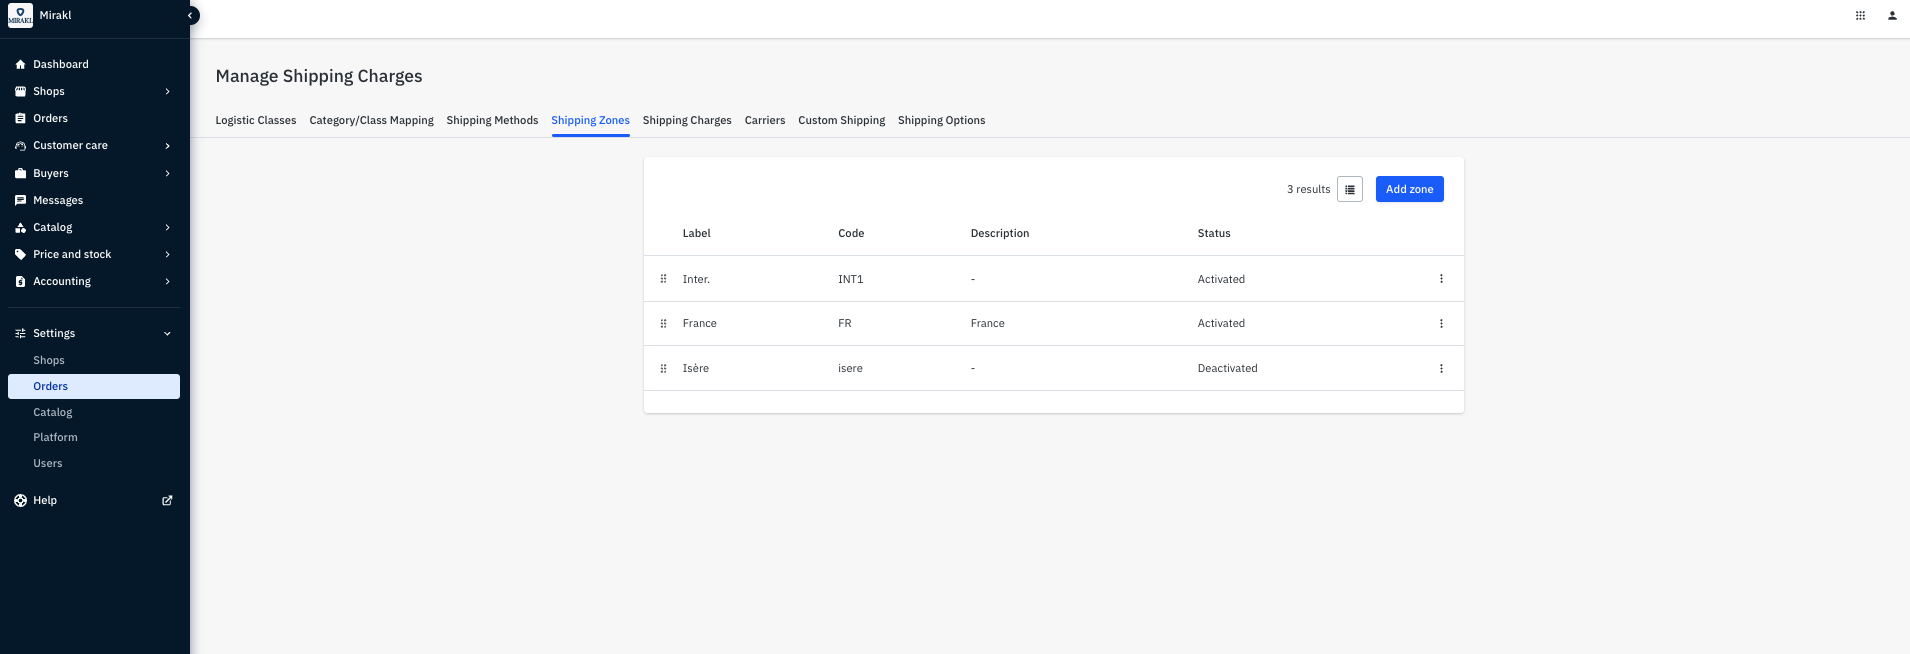
- Shipping zone: choose the one already activated and used in Mirakl under
Settings → Orders → Shipping costs → Delivery areas. DJUST
recommends keeping the shipping zone configured in Mirakl and input its
code.

Refer to Mirakl's documentation for more details.
- API Url:
You will need to decide which one of Mirakl's users will become an operator on DJUST. We recommend to designate the product owner or project manager and make sure their Mirakl account does not get deleted over time.
Configuring stores
The decision to use stores must be done before setting up the production platform. Your solution consultant will discuss this with you. Stores condition the whole data integration process, and the decision to use them cannot be reversed.
Stores allow the management of several e-commerce websites using specific URLs, from the same back-office in DJUST. This is useful if you address several segments of one market, different audiences and/or geographical areas, but need to manage all your websites from the same DJUST account.
Stores allow doing plenty of customization, but they are complex and can involve a lot of set up work. DJUST recommends using stores only if you are sure this is the best feature to address your use case (to be discussed with your solution consultant). You can check other features (prices different for customers or customer groups, customization of navigation categories, interactive rules module...) that also allow for catalog customization.
Stores are not meant to manage prices and catalog views, which is done with the interactive rules module. You can, if needed, use a combination of stores and catalog views to provide users with specific, dedicated product selections.
As the back office for stores is not finalized yet, prefer using .csv files to handle the import and updates of stores data.
Store data model
Your data model is the same for all stores (if you have multiple stores), but you will be able to contextualize your catalog by store, by filtering some products that you do not want to appear in one store but in the others.
Parameters (front-office)
Each store can have its own offers, products, suppliers, navigation categories, users and emails. In the back office, the data model appears the same; filtering is done through each website.
DJUST handles the configuration (if we are in charge of the front office). If you are handling it yourself, the right store needs to be called through the API. Refer to our API reference documentation for more information.
| Specific to stores |
|---|
| Suppliers are affected to stores through the .CSV import (or through Mirakl). This cannot be done through the back office yet. |
| Attributes can be assigned to one or multiple stores. Attributes properties are common between all stores. |
| Products are assigned per store. Their status (active / inactive) is however shared through all stores (one product cannot be active in one store and inactive in another one). |
| Offer stock status (active / inactive) is shared through all stores (one offer stock cannot be active in one store and inactive in another one). |
| Offer price is defined at the store level. |
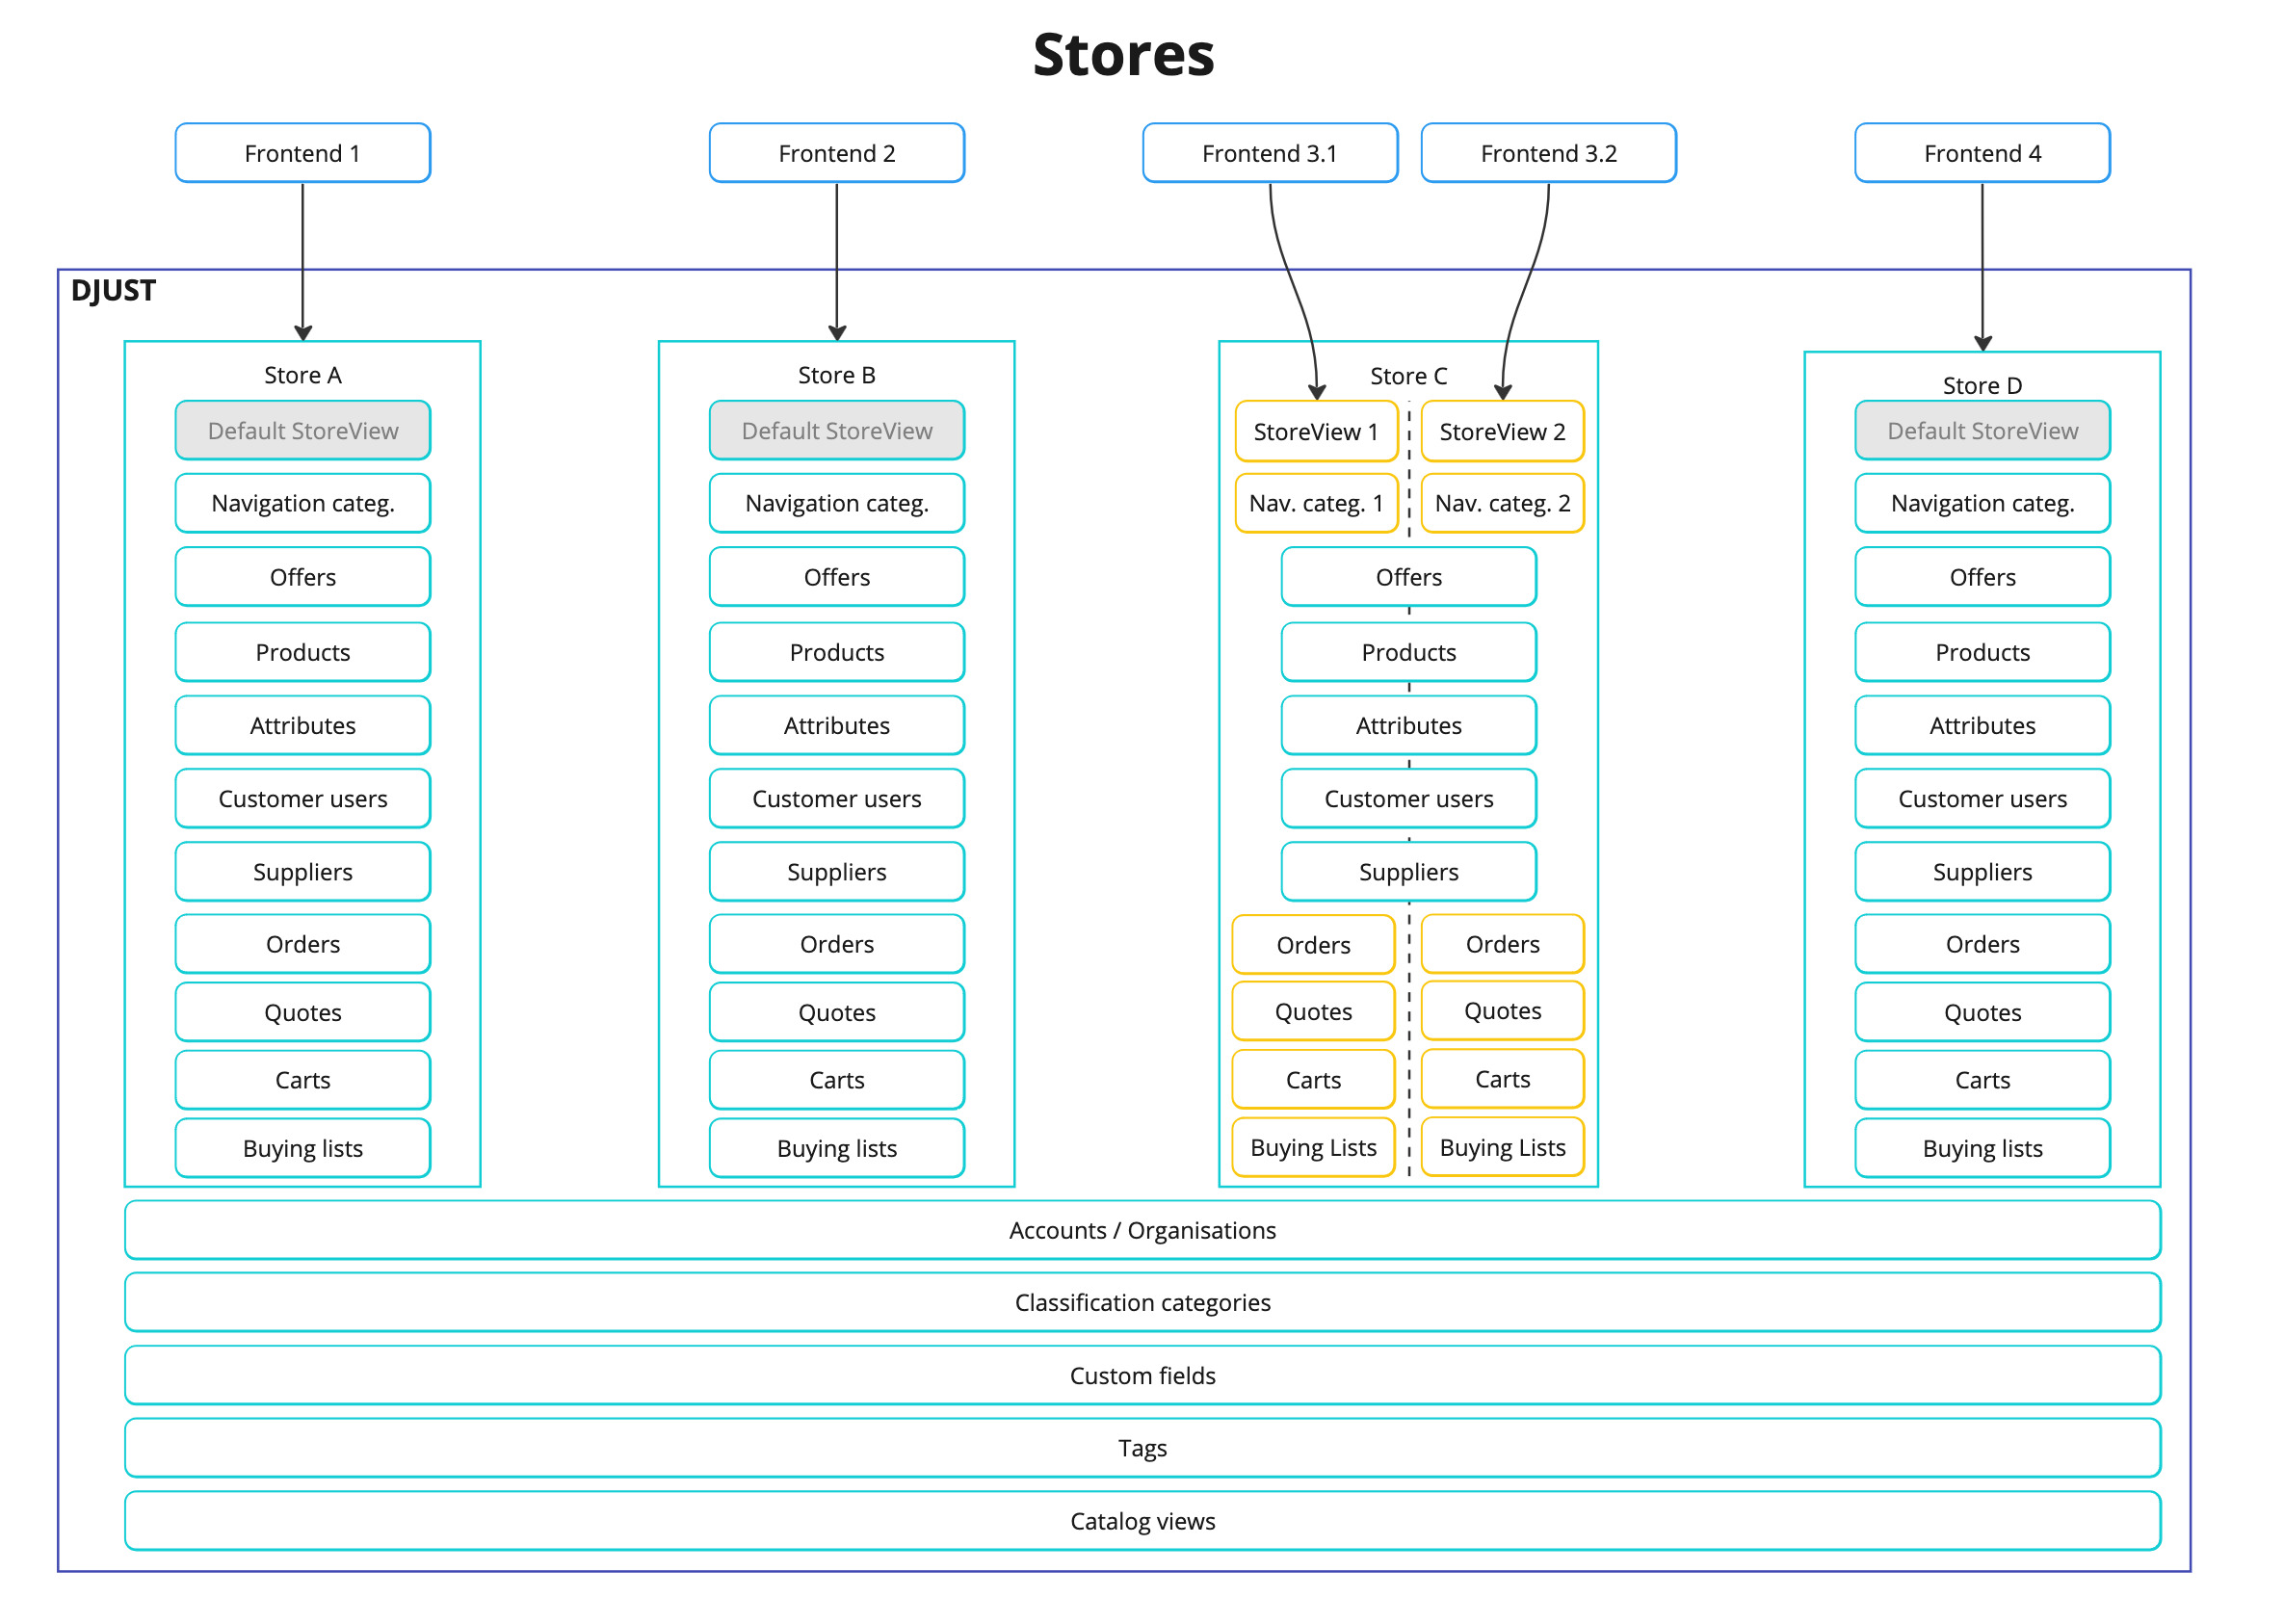
As indicated above, all stores share
- Accounts
- Attributes
- Classifications
- Custom fields and Tags
But have their own offers, suppliers, products, users and emails, as well as specific navigation categories for the different front offices.
Managing stores with multiple suppliers
Platform operators create supplier accounts. In the context of multiple stores and multiple suppliers, suppliers can be assigned to specific stores. Suppliers that are not assigned to a specific store will not be able to see it in their back-office and will not have access to the related data (sales, orders, products, etc.). One supplier can be assigned to one or several stores, and one store can host one or several suppliers. The operator remains in control of product approval for all stores. When customers order on a specific store, the order appears only on the back-office of this specific store.
The catalog views (catalog filtering) are linked to the account, whereas the environment (products, offers) is linked to the store.
Create stores
Click Settings → Stores.
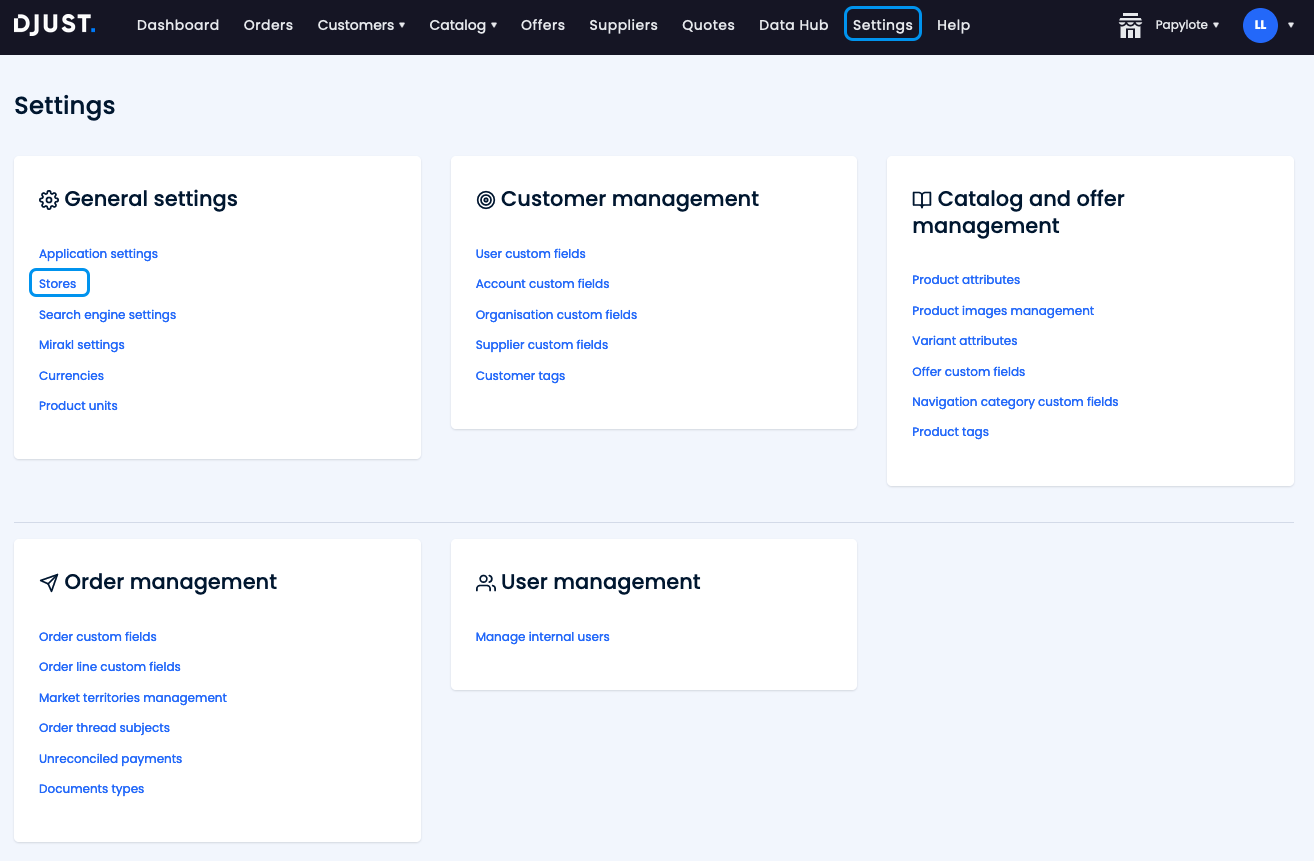
Click the + Add store button.

Fill in the Name, Description and an external ID for your store.
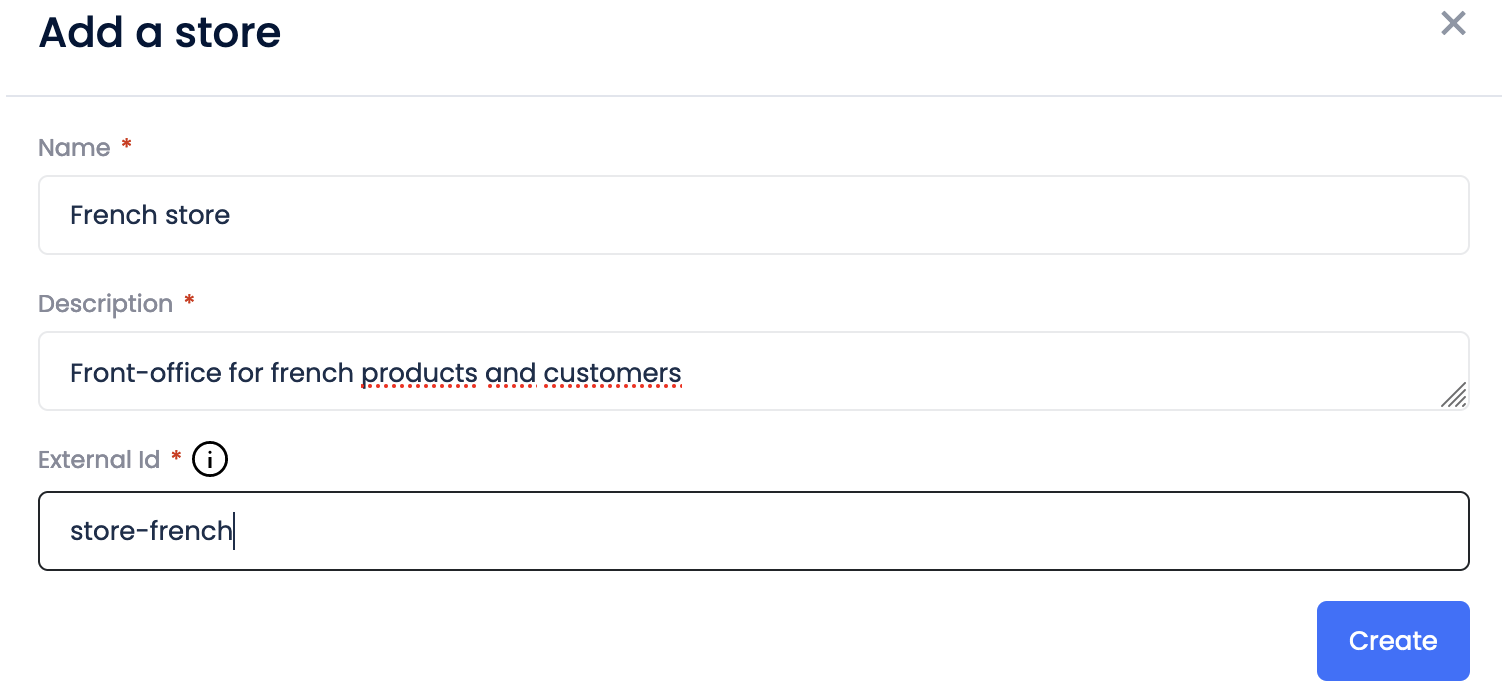
Click Create.
The new store appears right away in the list. Its default status is "Active".
Create store views (optional)
Store views are optional. Unless you have very specific needs that cannot be fulfilled by other features (catalog views, prices per customers, dynamic rules, etc.), we do not recommend using store views for the moment. If in doubt, contact your solution consultant.
Click an existing store, then + Add store view.
Fill in a Name and an External ID for your store view.

Click Create.
The new store view is visible in the list right away. Its status will be "active" by default.
Import store data
If you choose to import store data through a .csv file, use the following templates to structure your files. Do not hesitate to ask your solution consultant for ready-to-use templates, to make sure you are always using the most up-to-date version.
Classifications
| Name | Description | Mandatory (Y/N) | Type | Example |
|---|---|---|---|---|
| Code | External unique reference (must not start with 0) | Y | Text | DE_1 |
| Name | Product's name | Y | Text | Decoration |
| Parent code | Key to which the classification is associated | Y | Text | Root |
| attr_code | ID of the associated attribute | N | text / metric | ID1 |
| attr_enabled | Allow to activate the classification's attribute | N | TRUE / FALSE | TRUE |
| attr_indexable | If set to TRUE, can be used as a filter on the front-office | N | TRUE / FALSE | FALSE |
| attr_required | Make the attribute a mandatory field | N | TRUE / FALSE | FALSE |
| attr_forVariant | If set to TRUE, the attribute can be used as a variant. | N | TRUE / FALSE | FALSE |
Navigation categories
Products
| Name | Description | Mandatory (Y/N) | Type | Example |
|---|---|---|---|---|
| name | Product's name | Y | Text | iPhone |
| external_id | External reference (ID in the ERP) | Y | Text | 12345 |
| description | Product's description | N | Text | Smartphone made by Apple that combines a computer, iPod, digital camera and cellular phone into one device with a touchscreen interface. |
| brand | Product's brand | N | Text | Apple |
| productUnit | Product's base unit | N | Item | Item |
| productParentId | To input only in case of multiple variants | N | Number | 456789 |
| classification_category_id | Classification category ID | Y | Text | C1 |
| gtin | UPC (US) / EAN (Europe) / GTIN. Product's barcode classification | N | Text | 1234567890 |
| mpn | Manufacturer Part Number - ID provided by the supplier | N | Text | HSC0424PP |
| external_sku | Option to add a second external reference for your system. Must be unique. | N | Text | |
| main_image | Main image URL. | Y | Text | https://www.apple.com/euro/iphone-15/a/generic/images/overview/closer-look/pink_small_2x.jpg (opens new window) |
| additional_image_1 | Additional image URL | N | Text | |
| additional_image_2 | Additional image URL | N | Text | |
| additional_image_3 | Additional image URL | N | Text | |
| attributes_value | Add custom attributes | Y | ATTR_externalid | Column name: attr_description. Value: {description_name} |
| delete | Possibility to delete a product | N | If set to TRUE, deletes to product. | FALSE |
| Store | Store's external ID in which to send the product | N | If empty, product is sent to all stores. | 32322||5243||6363 |
Attributes
| Name | Description | Mandatory (Y/N) | Type |
|---|---|---|---|
| name | Attribute's name | Y | Text |
| external_id | Attribute's external ID | Y | Number |
| type | Attribute's format | Y | TEXT, LONG_TEXT, COLOR, LIST_METRIC or LIST_TEXT or LIST_COLOR, DATE, METRIC, NUMBER |
| multi | Offer multiple choices' selection for list-type attributes | N | TRUE / FALSE |
| unitType | Unit for the unitType "metric" | N | WEIGHT_METRIC, VOLUME_METRIC, LENGTH_METRIC, AREA_METRIC, WEIGHT_IMPERIAL, VOLUME_IMPERIAL, LENGTH_IMPERIAL, AREA_IMPERIAL |
| unit | Unit to provide for the "metric" type | N | For WEIGHT_METRIC: kg, g, mg. For VOLUME_METRIC: m3, L, cL, mL. For LENGTH_METRIC: m, cm. For AREA_METRIC: m2. For WEIGHT_IMPERIAL: lb, oz. For VOLUME_IMPERIAL: gal, qt, pt, fl oz. For LENGTH_IMPERIAL: yd, ft, in. For AREA_IMPERIAL: ft2. |
| attribute_values | Possibility to add custom fields or attributes | N | value||value||value |
| Store | Store for which the attribute is available | Y | Text or number |
Offers
| Name | Description | Comment | Type | Example |
|---|---|---|---|---|
| stock_id | MANDATORY. Stock ID (can be the offer ID if no stock). | external_id | Text | S_FRNS_PRODUCT |
| supplier_id | MANDATORY. Supplier code (internal to DJUST) | external_id | Text | FRNS_123 |
| variant_id | MANDATORY. Product's code or variant's code if any | external_id | Text | 1234G003 |
| stock | Stock quantity | If there is no unit in the stock, the offer will not appear on the front | Number | 10 |
| deleted | Possibility to delete an offer. If set to TRUE, deletes the offer. | TRUE / FALSE | FALSE | |
| active | Offer status. | TRUE / FALSE | TRUE | |
| packing_type | Packaging type: unit, box, bottle... | Text | UNIT | |
| quantity_per_item | Quantity contained in a package (expressed in the product's base unit) | Default: 1 | Number | 1 |
| currency | Offer's currency | Default: EUR | Text | EUR |
| customFieldValues | Custom field for offers | Each column associated with a custom field must be appended with CF_. Example: CF_WAREHOUSE. One column per custom field is required. | Text | Column name: CF_WAREHOUSE, value: 1234 |
| offer_id | MANDATORY. External reference for the price offer, in case of several prices for a same stock. | The external_id can be identical to the stock_id if only one price | Text | O_FRNS_PRODUCT |
| offer_type | Public prices (for all customers) or private prices (specific to a customer) | PUBLIC for public prices, ACCOUNT for specific prices | Text | ACCOUNT |
| account_external_id | Client reference for a private price | external_id | Text | 1234 |
| item_per_pack | Number of product units in the offer packaging | 1 for unitary sale, 6 for a pack of 6 products | Number | 1 |
| min_order_quantity | Minimum quantity for an order | Default: 1 | Number | 1 |
| price_range | Unitary price for the product | Format is quantity|price|discount price. Use || to indicate next range. If there is no discount price, only use quantity|price. If only price is input, we deduce a quantity of 1. | Text | Single price: 2|5. Price range: 2|5||10|4 |
| store | Store on which the offer is displayed | 1 line per store | Number or text, depending on the store external ID | RAO |
Users
| Name | Description | Mandatory (Y/N) | Type | Possible value |
|---|---|---|---|---|
| externalId | ID user defined by client | Y | Text | |
| civility | User's civility | Y | Text | MR, MRS, MISS |
| firstName | User's first name | Y | Text | |
| lastName | User's last name | Y | Text | |
| User email | Y | Text | ||
| phone | User's phone number | Y | Number | |
| groups | User's role in the front-office | Y | Text | FOC_Admin, FOC_User, FOC_Webmaster |
| organisationIds | Organisation's external ID | |||
| mainOrganisationId | Main organisation's external ID | |||
| accountIds | User's account external ID | Y | ||
| password | User's password | N | ||
| inactive | Activate or deactivate the account. If set to TRUE, user is active. | TRUE/FALSE | TRUE | |
| delete | Delete or keep the user. If set to TRUE, user is deleted. | N | TRUE/FALSE | FALSE |
| store | Store's external ID | Y |
Attaching customer users to multiple accounts (optional)
Customer users can be attached to multiple accounts, to be able to view and manage different accounts.
- Click Customers -> Customer users.
- Select a customer user.
- Click the ... button on the right and select Add accounts.

- Select the account(s) to attach the user to.
- Click Add.
If DJUST handles your front-office, we will determine if accounts are needed for your customer users to connect through your website (on top of the back office access). This is to be discussed with your solution consultant.